In my previous blog post I introduced Docker and its Fedora integration. Now it’s time to do some serious (read: useful) stuff.
A few years ago I started a project called CirrAS. It’s dead now, but the main idea behind it was to form a cluster of JBoss AS servers in the cloud, without any unnecessary steps. You just launched the instances, they found and connected to each other and the result was a working cluster. Additionally every cluster node registered itself in a front-end instance which worked as a load balancer and monitoring/management (we used RHQ) node.
You can still watch the screencast I created (over 3 years ago) to show how it works, but prepare for my Polish accent. You’ve been warned.
Since that was a few years ago and we now have both WildFly (the JBoss AS successor) and Docker in Fedora, it’s time to use these new techonogies to do something similar.
Preparations
Because we're IT hipsters we need to use the latest technologies like Fedora 20 (pre-release), WildFly 8 (pre-release) and Docker (soon-to-be-in-Fedora). As you can imagine, bad things may happen.
I assume you have Docker installed. If not, please refer to my previous blog post on how to do it on Fedora.
I've upgraded the Docker version available in my repo to 0.6.3.
I’ve done some of the hard stuff for you already; I’ve prepared a very basic Fedora 20 image for Docker. Grab it with:
docker pull goldmann/f20
Now that you have my image locally, you can try to run it, like this:
$ docker run -i -t goldmann/f20 /bin/bash
bash-4.2#
Building the basic WildFly image
Now it’s time to extend the goldmann/f20 image and install the wildfly
package on it. This can be easily done by using this Dockerfile:
# Base on the Fedora image created by me
FROM goldmann/f20

# Install WildFly
RUN yum install -y wildfly
Let’s build the image:
$ docker build .
Uploading context 10240 bytes
Step 1 : FROM goldmann/f20
 ---> 5c47c0892695
Step 2 : RUN yum install -y wildfly
 ---> Running in 984358fb5472
Resolving Dependencies
--> Running transaction check
---> Package wildfly.noarch 0:8.0.0-0.9.Alpha4.fc20 will be installed
--> Processing Dependency: java-devel >= 1:1.7 for package: wildfly-8.0.0-0.9.Alpha4.fc20.noarch

[...SNIP...]

  xstream.noarch 0:1.3.1-8.fc20
  xz-java.noarch 0:1.3-2.fc20
  zip.x86_64 0:3.0-9.fc20

Complete!
 ---> a70a03698e7e
Successfully built a70a03698e7e
Time to test our image, let’s run the container and start WildFly:
$ docker run -i -t a70a03698e7e /bin/bash
bash-4.2# /usr/share/wildfly/bin/standalone.sh
[...SNIP...]
09:25:55,305 INFO  [org.jboss.as] (Controller Boot Thread) JBAS015874: WildFly 8.0.0.Alpha4 "WildFly" started in 2789ms - Started 161 of 196 services (57 services are lazy, passive or on-demand)
Cool, it works!
Extending the WildFly image
Now that we have a working basic WildFly image, it’s time to make sure it works in a cluster too.
We’re going to create a standalone cluster. We won’t use the domain mode built into WildFly AS.
The Dockerfile
Take a look at our Dockerfile. I’ll describe the important stuff later.
It is a good idea to create a custom launch script for WildFly. This will
greatly simplify the Dockerfile for us. Our launch.sh file could look like
this:
#!/bin/bash

IPADDR=$(ip a s | sed -ne '/127.0.0.1/!{s/^[ \t]*inet[ \t]*\([0-9.]\+\)\/.*$/\1/p}')

/usr/share/wildfly/bin/standalone.sh -c standalone-ha.xml -Djboss.bind.address=$IPADDR -Djboss.bind.address.management=$IPADDR -Djboss.node.name=server-$IPADDR
And here is the Dockerfile itself:
# Base on the Fedora image created by me
FROM goldmann/f20

# Install WildFly
RUN yum install -y wildfly

# Create the management user
RUN /usr/share/wildfly/bin/add-user.sh admin Admin#70365 --silent

ADD launch.sh /
RUN chmod +x /launch.sh

# Run WildFly after the container boots
ENTRYPOINT /launch.sh
The first line tells docker that we want to use the goldmann/f20 image as our
base. The second line installs the wildfly package with all the required
dependencies (there are quite a few). Next, we create the admin user which
will be used for node management. We also inject the launch.sh file and make
it executable. This will be our entry point, meaning that this script will be
executed after the container boots.
Binding to the right address
When you boot WildFly as we did previously it will bind to 127.0.0.1. This is
not very useful since we’re launching an application server… We need to bind
it to the current IP address assigned to the NIC of the container. We can use
the jboss.bind.address. To get the IP we can use some shell scripting. Please
take a look at the launch.sh script above.
We do the same for the jboss.bind.address.management property which will be
used later.
Clustering
Our WildFly image uses the standalone.xml configuration file which is great,
but not for the clustering purposes. Let’s switch to standalone-ha.xml. This
will enable the clustering features.
The container network by default is multicast enabled. This is a great thing, since it allows WildFly’s auto discovery feature to work. Each node on the network will find and join the cluster automatically. Good stuff.
Please note that a node will search for clusters only when there is something deployed on it. When the application server is empty - it’ll register only in the front-end, without joining the cluster and setup session replication. This may be a bit misleading at first, since you’re expecting some messages in the logs right after starting a new node. Nope. You need to deploy an app first.
Application deployment
We need to think about deploying apps to the cluster. There are various ways
we can do it. I prefer to use the jboss-cli.sh script. To make it work,
we need to expose the WildFly management interface. Which we’ve done already (remember
the jboss.bind.address.management property?).
The last thing that prevents us from connecting to a running WildFly instance is
the lack of a management user. Authentication is not required when you try to
connect from localhost, but to connect to remote servers (our case) - we need
to create a user. We can use the add-user.sh shell script, like this:
/usr/share/wildfly/bin/add-user.sh admin Admin#70365 --silent
Nope, this is not a very secure password, but will do for now.
Done!
You can now build the image with docker build . and you’re done!
Building load balancer image
OK, we have the back-end image providing WildFly, but to have a proper cluster we need a load balancer. Let’s create one with Apache HTTPD as the proxy. We chose HTTPD because of a very nice project called mod_cluster. The mod_cluster project consists of two parts:
- An Apache HTTPD module,
- An application server component (shipped with WildFly, but available for other application servers too)
This is different from the mod_proxy setup, since the back-end
registers itself in the proxy, not the other way around. This is very
valuable since we’re going to start and shut down nodes depending on the load,
but the load balancer will stay online forever (hopefully).
Another nice thing is that if you have multicast enabled (which we do!) we
can use the
mod_advertise
module. This will make load balancer recognition very easy. The load
balancer will notify back-ends of its existence. When the back-end receives
this information, it will automatically register itself with the front-end, knowing
it’s location.
Cluster out-of-the-box? Yep, this is it.
Enough talking, let’s create the load-balancer image.
# Base on the Fedora image created by me
FROM goldmann/f20

# Install Apache and mod_cluster
RUN yum install -y httpd mod_cluster

# Disable mod_proxy_balancer module to allow mod_cluster to work
RUN sed -i 's|LoadModule proxy_balancer_module|# LoadModule proxy_balancer_module|' /etc/httpd/conf.modules.d/00-proxy.conf

ADD launch.sh /
ADD mod_cluster.conf /etc/httpd/conf.d/mod_cluster.conf

RUN chmod +x /launch.sh

# Do the required modifications and launch Apache after boot
ENTRYPOINT /launch.sh
The Dockerfile is simple. so I won’t describe it in detail. Instead I’ll
focus on the mod_cluster.conf and launch.sh injected into the image:
The mod_cluster.conf will overwrite the default config file
installed with the mod_cluster package. It will enable the advertise
and mod_cluster manager features, the latter of which exposes a simple
web interface allowing us to see all nodes connected to the cluster.
LoadModule slotmem_module       modules/mod_slotmem.so
LoadModule proxy_cluster_module modules/mod_proxy_cluster.so
LoadModule advertise_module     modules/mod_advertise.so
LoadModule manager_module       modules/mod_manager.so

MemManagerFile /var/cache/httpd
ServerName *:80

<VirtualHost *:80>

  EnableMCPMReceive true
  ServerAdvertise On
  ServerName loadbalancer

  <Location />
    Require all granted
  </Location>

  <Location /mod_cluster_manager>
    SetHandler mod_cluster-manager
    Require all granted
  </Location>

</VirtualHost>
Just like with the back-end, we inject a launch.sh script:
#/bin/bash

# Get the IP address
IPADDR=$(ip a s | sed -ne '/127.0.0.1/!{s/^[ \t]*inet[ \t]*\([0-9.]\+\)\/.*$/\1/p}')

# Adjust the IP addresses in the mod_cluster.conf file
sed -i "s|[0-9\.\*]*:80|$IPADDR:80|g" /etc/httpd/conf.d/mod_cluster.conf

# Run Apache
httpd -D FOREGROUND
The only thing we do here is adjust the IP addresses in the
mod_cluster.conf file. This will ensure we send the correct IP address to
the back-end nodes using the advertise feature.
You can now build this image.
Prebuilt Images
If you don’t want to take the time to build the images yourself, you can use
the images I’ve pushed to the Docker repository. To grab them,
just pull the goldmann/wildfly-cluster repo:
docker pull goldmann/wildfly-cluster
This will take some time, since these images are quite big. In the end, you’ll
have three images with the following tags: front-end, back-end and
back-end-base.
Testing
Once you’ve built (or pulled) the images, we can begin to test them. Let’s start with the front-end image:
docker run -d -p 80:80 goldmann/wildfly-cluster:front-end
This will start a front-end container in detached mode. As a bonus we’re
redirecting port 80 from the host directly to this container making the
Apache running in the container available directly via the host IP.
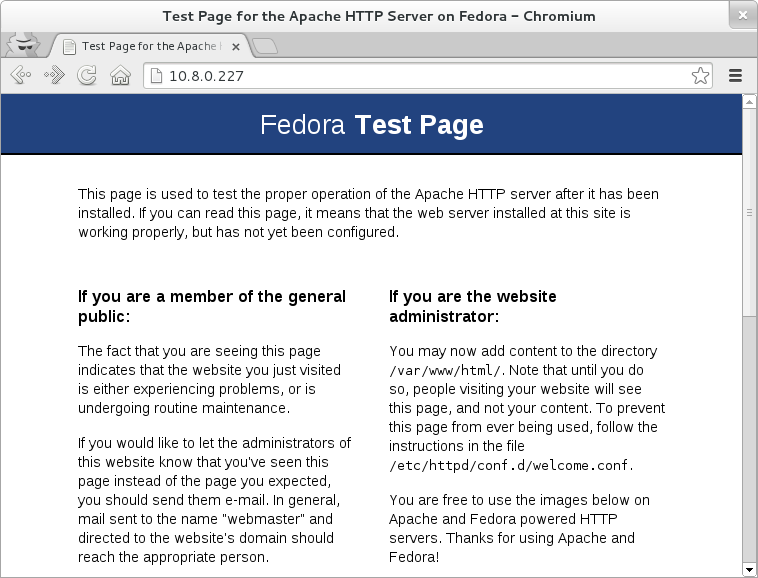
If you go now to the host IP address using your browser, you should be
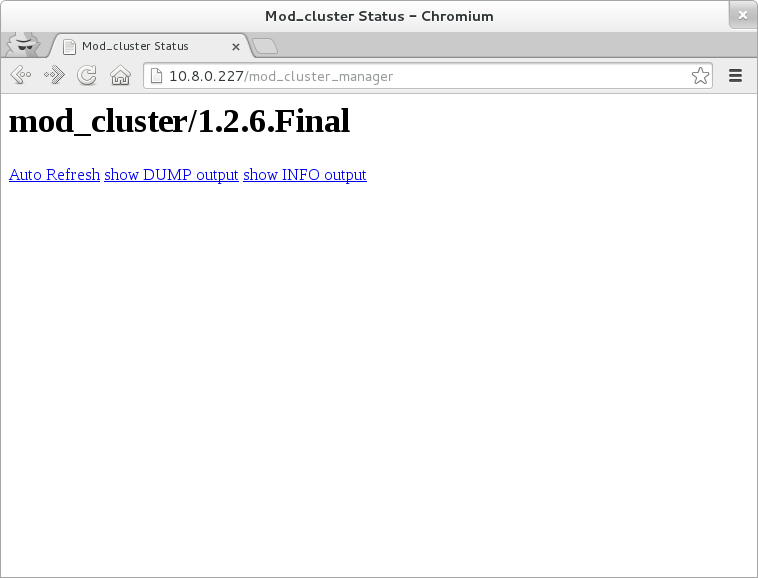
see the Apache HTTPD test page. If you point your browser at
/mod_cluster_manager, you should see a mod_cluster manager page without any
nodes.
Let’s add some back-end nodes. Run this twice:
docker run -d goldmann/wildfly-cluster:back-end
Wait a few seconds, and refresh the browser. You should now see two nodes.
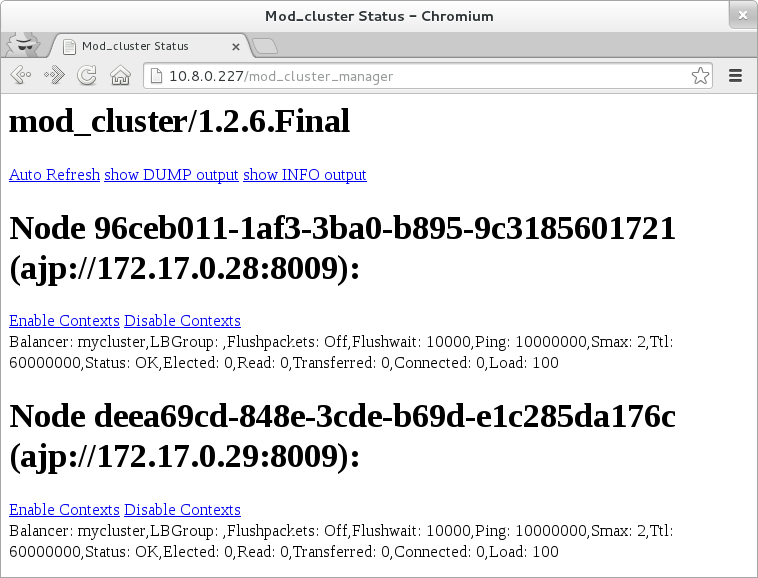
Your cluster is working, congrats!
Deploying applications
We prepared the back-end nodes for management by creating the management user
before. Now it’s time to use this user to deploy an application. You’ll need the
jboss-cli.sh script shipped with WildFly. You can get it by downloading
WildFly or installing it (for exmaple using
yum install wildfly, if you’re on Fedora 20+).
We need the IP address of the node we want to connect to. You can use the
docker inspect command, looking for the IPAddress.
Next we need to connect to (use port 9990) and authenticate with (use
admin/Admin#70365 credentails) the node:
$ $WILDFLY_HOME/bin/jboss-cli.sh
WARN: can't find jboss-cli.xml. Using default configuration values.
You are disconnected at the moment. Type 'connect' to connect to the server or 'help' for the list of supported commands.
[disconnected /] connect 172.17.0.2:9990
Authenticating against security realm: ManagementRealm
Username: admin
Password:
[[email protected]:9990 /] deploy your-app.war
The CLI provides you many useful (and powerful) features. From deploying to managing the whole server. You can learn more about it in the documentation.
Once you deploy your web app, you’ll see the context avaiable in the mod_cluster manager.
To deploy the application on every node in the cluster (in standalone mode) you need to repeat the above step for all nodes in the cluster. Of course there are other options, but this is not part of the tutorial.
The last thing left is to point your browser at the front-end IP and the context of your app. It should be available and running. If you deploy your app on multiple nodes requests will be routed to all back-ends, as you would expect. Try it out!
Summary
It’s really easy to create a cluster for your Java EE applications using Docker and Fedora. Because of the nice Docker/LXC features, we’re now able to grow the cluster in literally seconds.
Once again: everything shown here is based on pre-releases. The Fedora/WildFly/Docker integration will be improved over time, but give it a shot today and let me know how you like it. If you find a bug, please report it directly in Bugzilla or ping me in the #fedora-cloud or #fedora-java IRC channels.