There are various ways to set up logging for Docker containers. Docker itself
has a built-in logs command, you can mount a volume from the host and save
the logs there, you can create a different container that would be
only responsible for log handling, or set up a logging daemon. Every method
has some pros and cons and it is up to you to choose the one that fits best.
Let’s go through each of these options, learn a litle about the it,
and modify the jboss/wildfly image use it.
|
Note
|
I won’t talk about WildFly logging in general, in this blog post I’ll focus on the required changes (if any) to make it work inside a container. If you’re interested in the logging subsystem configuration, please refer to the documentation. |
TL;DR;
Don’t use docker logs in production. Mounting volumes from a host is simple
but could be tricky, especially if you run
SELinux. If you set
it up correctly, you’ll be happy. Using data containers is fun and probably a
good way to do logging. If you need more control, set up a logging daemon.
Examples are available on GitHub.
docker logs
The logs
command is a handy feature of Docker. If the process you run inside of the
container prints something to standard output (or standard error) - the
message is saved in a log and available for reading later.
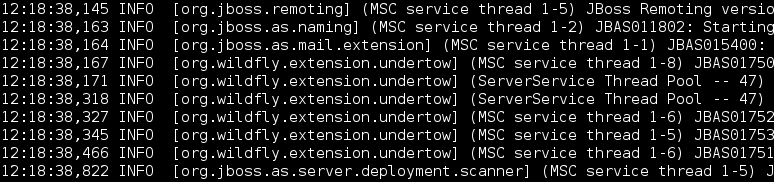
Using docker logs is the simplest way to read logs from a container.
# Start the container and save the container ID
ID=$(docker run -d jboss/wildfly)

# Use the ID to read the logs from the selected container
docker logs -f $ID
This approach is nice if you want to see what’s going on inside of the
container. I do not recommend using it in production as the only way of
logging. You may ask why? Every line of the output is saved in a JSON formatted
file (see /var/lib/docker/containers/$ID/$ID-json.log) accompanied by a bit
of metadata (timestamp for example, where most logs include it anyway). The
log file can grow pretty quickly, especially if you have a lot of messages.
Grepping JSON is not much fun either. Additionally stacktraces are split line-by-line.
If this is not an issue for you - go for it.
|
Note
|
You can access logs from a stopped container too, which is a plus. |
In the jboss/wildfly image, we didn’t change the default logging configuration.
Everything that goes to the console will be available using the docker logs
command.
You can change this behavior by customizing the
/opt/wildfly/standalone/configuration/standalone.xml file (if you actually
use the default standalone profile). For example you can remove the CONSOLE
handler entirely to stop printing anything to the console.
Mounting a volume from the host
Mounting a volume from the host and exposing it in the container is another way to store logs. In this case every file written to the directory will be immediately available on the host. This way you can have multiple containers saving logs to the host’s directory (which may be very handy in some cases).
|
Note
|
The biggest issue with this approach is that it is not portable. You need to setup the directories once again when you move to another host. |
Permission denied
If you use the -v switch from the docker run command and try to mount a
non-existent directory from the host — a new directory will be created on the
host with root as the owner and 755 permissions making it not writable for
any other user than root inside of the container. The jboss/wildfly image
does use the wildfly user to run the Java process, so it will not be able to
store logs in the mounted directory.
Of course there is a way to make it work.
Let’s make it writable
The trick is to have a user with the same uid/gid both in the container and on the host.
The jboss/wildfly image uses a wildfly user with
a well
known user uid/gid (431/433) to run the server. We can use this information
and create a wildfly-logs user on the host with the same uid/gid. This will
make the mounted volume available to read/write operations for the wildfly
user inside of the container.
Run on the host:
groupadd -r wildfly-logs -g 433
useradd -u 431 -r -g wildfly-logs -s /sbin/nologin -c "WildFly container logs" wildfly-logs
Cool, now we have the user, let’s create the directory we will mount later in the container.
mkdir /opt/logs/wildfly-01
chown wildfly-logs:wildfly-logs /opt/logs/wildfly-01
chcon -t svirt_sandbox_file_t /opt/logs/wildfly-01
Please note the last command. We need to change the SELinux label to
svirt_sandbox_file_t for this directory so the Docker daemon can write to it.
You can read more about
SELinux and Docker on
the Project Atomic website.
Now we can start the container with the volume mounted in
/opt/wildfly/standalone/log.
docker run -d -v /opt/logs/wildfly-01:/opt/wildfly/standalone/log jboss/wildfly
|
Note
|
The same wildfly-logs user can be used for any jboss/wildfly
containers, because each container has a wildfly user created with the
particular uid/gid.
|
Read more about using Docker volumes in the documentation.
After you boot the container, you can go to the /opt/logs/wildfly-01 directory on
the host. You should find the server.log file there.
Using a data container
This is a variation of the logging to a mounted host directory approach. In this case instead of mounting a directory from host we use another container’s exposed volume. Such containers are called data containers. Their responsibility is to hold some data. You can use one container to save logs from many other containers. As a plus, this approach is portable — you can take your containers and launch them on a different host and everything will work.
The data container image
|
Note
|
All files are available on GitHub. |
First we need to prepare an image that will be used to launch a container where we want to store our logs.
FROM jboss/wildfly
RUN mkdir -p /opt/wildfly/logs
VOLUME /opt/wildfly/logs
CMD true
Save the above snippet as Dockerfile and build it with docker build
--rm --tag=data ..
|
Note
|
The CMD instruction above is not a mistake. To use the exposed
volumes from a container it doesn’t need to be actually running. After
executing the true command the container will be stopped, but we’ll
still have access to the volumes.
|
You may wonder why we extend the jboss/wildfly image in first place and not
use a clean fedora image. The reason is that the jboss/wildfly image already has
a wildfly user created. As I mentioned
above, the same user will be used to launch the Java processes and if we mount a
volume owned by this user, it will be available for writing. We don’t waste
any disk space by using this approach, because Docker uses a copy-on-write
filesystem.
Let’s run our data container:
docker run --name data data
Exported volumes and paths
Mounted data volumes are visible under the same path as they were exported.
This means that if we export the /opt/wildfly/logs volume in the data
container and mount it in our WildFly container — it’ll be visible under the
/opt/wildfly/logs path there too.
|
Note
|
This is not strictly true if you try to export a path that is actually a
symlink. In such cases the resolved path will be exported, not the symlink, so
in our case it will be /opt/wildfly-8.1.0.Final/logs instead of
/opt/wildfly/logs, but this won’t change anything for us.
|
Sometimes having a single location mounted in many containers under same path
is desirable (for example database data), but in our case (logging from
multiple WildFly containers) it would cause problems. Imagine an exported
/opt/wildfly/standalone/log volume being mounted in many WildFly containers at the
same time…
There are many solutions; for example you can change the WildFly configuration
to log to different directories or you can just symlink the
/opt/wildfly/standalone/log directory to some /opt/wildfly/logs
subdirectory in the way it makes sense for you.
In this blog post I’ll show how to use the first solution.
Modifying the WildFly image
|
Note
|
All files are available on GitHub. |
Now we create a new image that extends the jboss/wildfly image. The change we
want to make is to modify the configuration that controls where the logs are stored:
FROM jboss/wildfly
RUN sed -i 's|<file relative-to="jboss.server.log.dir" path="server.log"/>|\<file relative-to="jboss.home.dir" path="logs/\${jboss.host.name}/server.log"/\>|' /opt/wildfly/standalone/configuration/standalone.xml
This simple sed call changes the default location of the log file. We make the path
host aware by using the jboss.host.name property. At the time of launching
the container we have full control over the hostname. We can us the -h switch
from the docker run command to specify the host name or just leave it as-is
and jboss.host.name will be resolved to the shortened container id.
Let’s build the image:
docker build --rm --tag wildfly-logs .
And finally launch it:
docker run -d -h wildfly-01 --name wildfly-01 --volumes-from data wildfly-logs
We can launch even more containers and all of them will save logs in our data
container:
docker run -d -h wildfly-02 --name wildfly-02 --volumes-from data wildfly-logs
docker run -d -h wildfly-03 --name wildfly-03 --volumes-from data wildfly-logs
Getting access to the logs
We log from all our containers to one place, cool, but how to get access to those logs? It’s not so hard:
docker run -it --rm --volumes-from data -v `pwd`:/backup fedora sh -c 'cp -r /opt/wildfly-8.1.0.Final/logs /backup && chown -R 1000:1000 /backup/'
This (somewhat lengthy) command will start a new container with the current
directory mounted as /backup and the exported volume from the data
container mounted in its path. Then it copies all the logs from the exported
volume to our local directory and changes ovnership of these files to my local
user. This way we can have full control over these files. My local account has
a uid/gid of 1000, so this works for me. You’ll probably need to adjust the
uid/gid to match your own.
|
Note
|
Do not forget to chcon -t svirt_sandbox_file_t . the directory where
you want to store the logs locally so the the copy can be performed.
|
$ ls -hall logs/*
logs/wildfly-02:
total 16K
drwxr-xr-x. 2 goldmann goldmann 4,0K 07-16 16:12 .
drwxr-xr-x. 4 goldmann goldmann 4,0K 07-16 16:12 ..
-rw-r--r--. 1 goldmann goldmann 4,9K 07-16 16:12 server.log

logs/wildfly-03:
total 12K
drwxr-xr-x. 2 goldmann goldmann 4,0K 07-16 16:12 .
drwxr-xr-x. 4 goldmann goldmann 4,0K 07-16 16:12 ..
-rw-r--r--. 1 goldmann goldmann 3,9K 07-16 16:12 server.log
Exactly what we needed!
Logging daemon
Logging to a file is nice, but sometimes you need to manage logging in a more powerful way. The are many solutions available like syslog-ng, rsyslog, or logstash. No matter which one you choose, they’re all pretty flexible and easy to set up.
I would like to show you how to set up a syslog-ng daemon (running in a
container) with the jboss/wildfly Docker image.
syslog-ng image
|
Note
|
All files are available on GitHub. |
The first step is to prepare the syslog-ng Docker image.
FROM fedora
RUN yum -y install syslog-ng && yum clean all
ADD syslog-ng.conf /etc/syslog-ng/syslog-ng.conf

VOLUME /var/log/wildfly
EXPOSE 514/udp

CMD ["/usr/sbin/syslog-ng", "-F", "--no-caps"]
And here is the simple syslog-ng.conf:
@version:3.4

options {
    flush_lines (0);
    time_reopen (10);
    log_fifo_size (1000);
    chain_hostnames (off);
    use_dns (no);
    use_fqdn (no);
    create_dirs (no);
    keep_hostname (yes);
};

source s_sys {
    udp(ip(0.0.0.0) port(514));
};

destination d_wildfly { file("/var/log/wildfly/$HOST.log" template("$ISODATE $PRIORITY $MSG\n") template_escape(no)); };

log { source(s_sys); destination(d_wildfly); };
This is a very simple syslog-ng configuration file. When a new message arrives,
it will be saved to a file corresponding to the hostname the message comes from.
And since we can easily change the hostname of our containers, we will
immediatelly know which container logged what.
Build the image with docker build --rm --tag syslog ..
|
Note
|
I need to mention that the true power in this (or any other) logger solution is to be able to filter and route the selected messages. The above example is just a start, don’t be afraid to extend it! |
We can start the logging container and proceed to the next step.
docker run -d --name syslog syslog
Modifying the WildFly image
|
Note
|
All files are available on GitHub. |
Since logging to syslog is not enabled by default we need to modify our WildFly
configuration to let the server know where the syslog-ng daemon is listening.
To do this we need to add the syslog-handler to the logging subsystem in the /opt/wildfly/standalone/configuration/standalone.xml file:
<syslog-handler name="SYSLOG">
    <level name="INFO"/>
    <hostname value="${jboss.host.name}" />
    <server-address value="${env.SYSLOG_PORT_514_UDP_ADDR}" />
    <port value="514" />
    <formatter><syslog-format syslog-type="RFC3164"/></formatter>
</syslog-handler>
And enable it:
<handlers>
    <handler name="SYSLOG"/>
</handlers>
The above configuration will make sure we send the messages to the proper destination.
We use the SYSLOG_PORT_514_UDP_ADDR environment variable to determine the IP
address of the host where syslog-ng is running. More on this variable in a bit.
Now you need to build the image:
docker build --rm --tag wildfly-syslog .
That’s all. Now you need to run one or more wildfly-syslog containers. All of
them will be saving logs to the syslog container over UDP.
docker run -d --link syslog:syslog wildfly-syslog
The --link switch will create environment variables based on what
the syslog container is exposing, and it exposes the 514 UDP
port. Docker will create the SYSLOG_PORT_514_UDP_ADDR
environment variable (and many others) for us which will tell us the IP where
the syslog container is running.
The Docker links
feature if a great way to make containers talk to each other without
hardcoding the connection parameters.
Accessing logs
In the above example we still log everything to files. If you would like to receive
them from the syslog container you can use a similar method as described in the
Getting access to the logs section above.
Summary
As you can see, logging in a container can be easy and powerful at the same time. You need to choose the best option for you. There is no golden mean.
I hope this blog post will help you manage your logs. If you have ny ideas on how to
make the logging easier with the jboss/wildfly image, feel free to leave a
comment or file a ticket.